How To Sterilise Dental Equipment
26th Sep 2025
26th Sep 2025
How To Sterilise Dental Equipment
One of the most critical components of safe and effective dental care is the rigorous sterilisation of all dental instruments. This process not only protects patients from harmful bacteria, viruses and cross-contamination but also ensures the clinic operates in accordance with the highest infection control standards.
In this guide, we explore how to sterilise dental equipment, from pre-cleaning to safe storage, so dental professionals can safeguard patient wellbeing and support consistent clinical outcomes.
How is dental equipment sterilised?
Step 1: Manual cleaning
Before disinfection or sterilisation can occur, all reusable dental instruments must be thoroughly cleaned to remove visible debris. This includes any item that comes into contact with blood, saliva or mucous membranes, such as handpieces, mirrors, scalers, forceps and surgical tools.
Manual cleaning involves rinsing instruments under running water and scrubbing them with a detergent or enzymatic solution. Use soft-bristled brushes to reach into hinges, joints and textured areas. If available, ultrasonic cleaners or washer-disinfectors can make the job quicker and more consistent, especially for instruments with complex shapes.
Always follow the manufacturer’s instructions for cleaning each instrument. They’ll specify if disassembly is required and note any extra maintenance steps like lubrication or sharpening.
Step 2: Dental equipment sterilisation
Once cleaned, instruments are dried, inspected and packaged in sterilisation pouches or wraps. Sterilisation is the process that completely destroys all forms of microbial life, including resistant bacterial spores.
The three most commonly used sterilisation methods include:
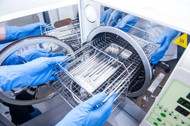
- Steam sterilisation (Autoclaving) — It works by exposing instruments to high-pressure steam at temperatures typically ranging from 121°C to 134°C. Instruments are placed inside an autoclave, a specialised chamber designed to generate and maintain steam under controlled pressure. Sterilisation cycles can vary from four to 30 minutes, depending on the load type and the specific cycle used. After sterilisation, a drying phase, lasting between 25 and 40 minutes, helps eliminate any residual moisture and ensure the instruments are ready for safe storage and use.
- Chemical vapour sterilisation — Sterilising dental equipment using chemical vapour involves exposing instruments to a pressurised, heated environment with a specially formulated solution for 10 to 30 minutes. The solution may contain agents such as alcohol, ketone, acetone or formaldehyde. Although this is a proven method, it must be used with care. Certain chemical substances, including hydrochloric acid and diluted sulphuric acid, can cause corrosion or damage to instruments. Choosing compatible materials and following proper usage guidelines is essential to prevent degradation.
- Dry heat sterilisation — This method uses high temperatures, typically between 160°C and 180°C, to sterilise instruments. It's ideal for instruments that may be damaged by moisture, such as those with fine or sharp edges. Dry heat sterilisation can be done using either static air or forced air systems. Although the process takes longer than steam sterilisation, it is equally reliable when performed correctly.
Step 3: Proper storage
After sterilising, dental equipment and supplies should be stored in clean, enclosed cabinets to protect them from dust, moisture and potential contamination. Before use, each wrapped package should be carefully checked to ensure the packaging remains intact. If a pack appears wet, torn or punctured, it is no longer considered sterile. In such cases, the instruments must be removed, cleaned, repackaged and sterilised again before they can be safely used on a patient.
Additional tips for proper dental equipment sterilisation
Beyond the core steps, effective sterilisation also relies on daily habits, good workflow design and ongoing attention to detail.
- Wear appropriate PPE during reprocessing
Always wear gloves, eye protection and masks when handling contaminated instruments or working near ultrasonic cleaners and sterilisation equipment. This helps protect staff from sharp injuries, splash hazards and chemical exposure. - Don’t overload the steriliser
Overloading trays or stacking pouches can prevent steam or heat from reaching all surfaces of the instruments. Load instruments in a single layer and be sure to follow your unit’s loading instructions. - Label and track sterilised packs
Use sterilisation indicators, date labels and batch tracking numbers on every pouch or wrapped pack. This helps with quality control, traceability and managing expiry dates. - Regularly monitor steriliser performance
Use a combination of physical (time and temperature gauges), chemical (indicator strips) and biological (spore tests) monitoring. Routine checks help validate that your steriliser is working correctly.
Invest in high-quality dental instruments at Erskine Dental
An efficient dental practice depends on equipment that supports safe, sterile care at every stage of treatment. At Erskine Dental, we offer many infection control products, such as steri pouches, disinfectants, detergents, eyewear and facewear, wipes and towels.
We are committed to supplying trusted dental instruments that meet the demands of modern clinics. From diagnostic, surgical and restorative instruments to everyday oral care supplies, our range is built to ensure streamlined, premium dentistry.
Ready to upgrade your equipment? Get in touch to place an order or speak with our team for expert product advice.


